
Create return delivery
This process describes how to create and prepare a planned return delivery for a project. Return deliveries are created in essentially the same way as deliveries. The main difference is how the material list is filled: instead of importing a CAD file or selecting parts in the part browser, you add the project stock to the return delivery.
If material returns from the construction site unexpectedly after assembly, the return delivery does not need to be created in advance. The returned material can be entered directly in the mobile app as described under Carry out return delivery.
The following steps describe the workflow in the web app.
flowchart TD
    C["1. Create return delivery"] --> D["2. Add project stock"]
    D --> E["3. Set to Reserved<br/>(optional)"]
    E --> F["4. Set to Planned"]
    F --> G["5. Assign employees<br/>(optional)"]
    G --> H["Next: Carry out return delivery"]
    classDef optional stroke-dasharray: 6 4
    class E,G optional
    click C "#1-create-return-delivery" "Go to Create return delivery"
    click D "#2-add-project-stock" "Go to Add project stock"
    click E "#3-set-return-delivery-to-reserved-optional" "Go to Set return delivery to Reserved"
    click F "#4-set-return-delivery-to-planned" "Go to Set return delivery to Planned"
    click G "#5-assign-employees-optional" "Go to Assign employees"
    click H "/en/general/execute_return_delivery" "Continue to Carry out return delivery"
The chart shows how a planned return delivery is prepared, released, and assigned to the responsible employees.
Download manual workflow as PDF1. Create return delivery
Section titled “1. Create return delivery”Open the relevant project and switch to the Return Deliveries tab. Click the plus button, select Return Delivery, and create the new list. The open project is already entered as the start.
Then add:
- the warehouse as the destination
- an optional return delivery name
- the delivery date
- an optional comment
All new material lists are created with Draft status.
2. Add project stock
Section titled “2. Add project stock”Open the return delivery’s action menu and click Fill Parts & Quantities. This adds all parts and quantities that are expected to be at the project on the entered delivery date.
Review the list afterward and adjust it if necessary. Unlike a delivery, this does not require a CAD import or manually selecting every part in the part browser.
Target quantities in the mobile app
Section titled “Target quantities in the mobile app”Users without the Show target quantities for return lists permission do not see the planned quantities in the mobile app. This prevents the expected quantities from influencing them when counting the material that actually returns.
The permission can be configured for each role in the company settings.
3. Set return delivery to Reserved (optional)
Section titled “3. Set return delivery to Reserved (optional)”Set the return delivery to Reserved if the list should be released first without being handed over for execution yet.
If return deliveries should move directly to Planned, disable Enable Reserved Deliveries in the company settings.
4. Set return delivery to Planned
Section titled “4. Set return delivery to Planned”Set the return delivery to Planned once the list is complete and ready to be carried out.
When changing the status, you are asked whether to create a Transport Task and/or a Warehouse Task:
- Create Transport Task is important when a driver collects the material from the construction site.
- Create Warehouse Task is important when the returned material is subsequently stored in the warehouse.
5. Assign employees (optional)
Section titled “5. Assign employees (optional)”Open the created tasks and assign a Driver to the transport task and a Warehouse worker to the warehouse task.
If required, you can also assign a Vehicle, Trailer, Platform, Staging Area, or Crew.
For more information, see Assigning tasks.
The return delivery has now been created and is ready to be carried out. Continue with Carry out return delivery.
Option: Create a return list when completing a delivery
Section titled “Option: Create a return list when completing a delivery”You can also create a return list directly from a delivery to a project. This alternative is available in the web and mobile apps.
- Open the delivery and start the transition to the delivered status. In the web app, use the checkmark at the bottom right; the list must have reached at least the planned status.
- Enable return-list creation in the completion dialog.
- Choose to copy parts only without preset quantities or to copy the delivered quantities.
- Confirm. The delivery is completed and the new return list opens immediately.
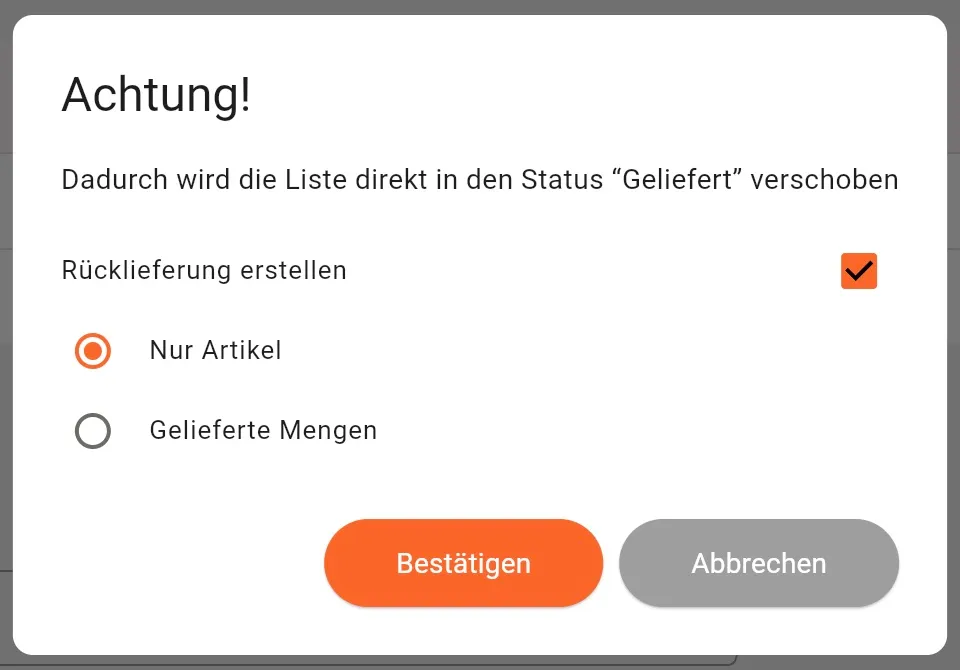
The German screenshot shows Rücklieferung erstellen (create a return list), Nur Artikel (parts only), Gelieferte Mengen (delivered quantities) and Bestätigen (confirm).
Review the new return list and adjust it to the planned return. Copied quantities do not replace counting the material actually returned. See Carry out return delivery for recording the return.
For a delivery to a warehouse, return-list creation is disabled.