
Articles
On this page you will learn how to create, edit and manage articles in Stocadro. Articles form the basis for supplier orders, delivery notes, catalogues and other logistics processes.
In the web app you will find articles under Resources.
Search for parts
Section titled “Search for parts”Open the parts overview in Resources and enter a search term. The first character automatically determines the search mode:
- Starts with a digit, for example
12345: the search is exact, which is useful for item numbers. - Starts with a letter, for example
Layher: the search also finds partial terms and similar spellings.
This also applies when selecting parts for material lists and templates. You do not need to change the search mode manually.
Structuring the article master
Section titled “Structuring the article master”A clean structure for the article master is essential for efficient use in downstream processes, e.g. for supplier orders or warehouse operations. It is therefore advisable to determine in advance how the article master should be structured and which structuring and filtering options should be used.
Articles can be structured and filtered using various parameters:
- Categories
Categories control the sorting of articles in the Add article option in material lists and in the mobile app. Sorting is done alphabetically. To specify a fixed order, it is recommended to use a prefix, e.g.
001_,002_, etc. - Manufacturer catalogues Manufacturer catalogues structure your own article master according to the catalogues published by the manufacturers (e.g. “Layher Allround”). An article is assigned to a manufacturer catalogue automatically via the article numbers. Users cannot influence this assignment.
- Own catalogues Own catalogues are used to restrict and structure article access on a user-specific or use-case basis.
Existing overview sheets or material lists that were previously used to manually create material lists can serve as an initial point of reference.
These can usually be transferred well to categories and catalogues and form a solid basis for a consistent, long-term maintainable article master.
Creating an article
Section titled “Creating an article”You create a new article by clicking the plus icon at the bottom right of the screen. For correct use in downstream processes, it is important that all relevant data is filled in completely and correctly.
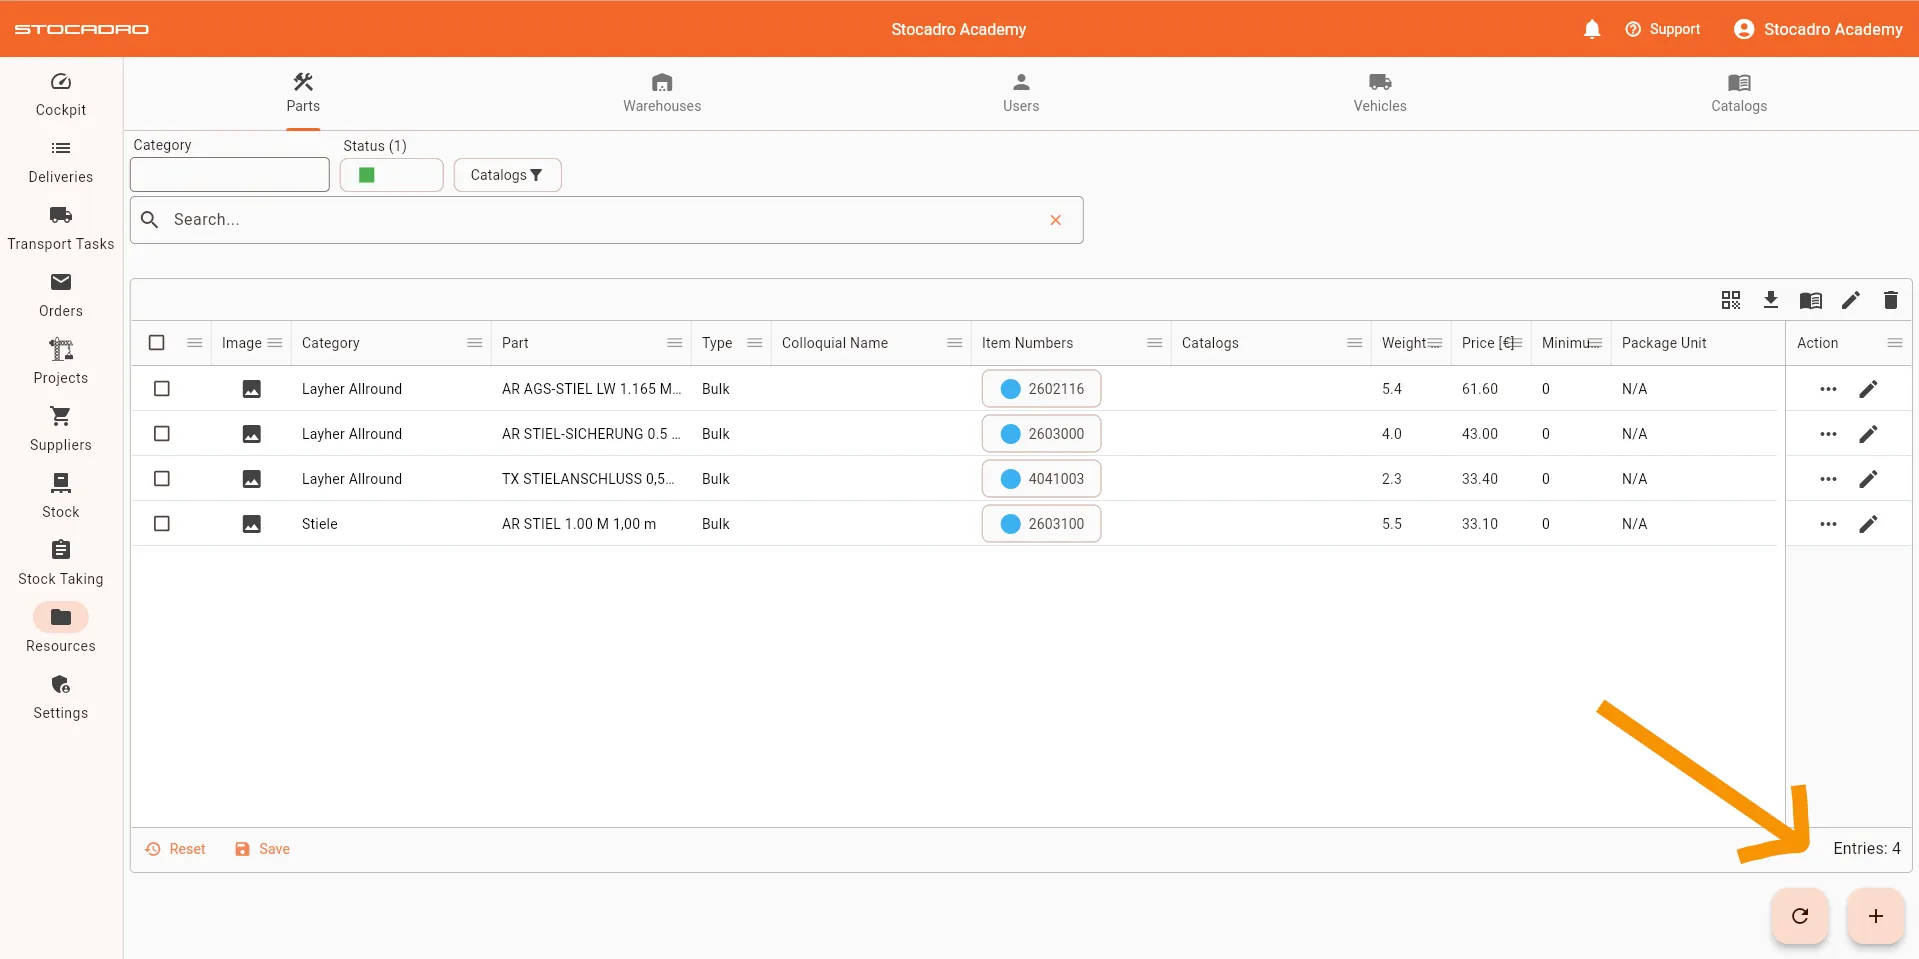
When creating an article, you have three different options:
- Import from manufacturer catalogues
- Manual creation
- Import from an Excel file
Manual creation
Section titled “Manual creation”When creating manually, you can define the following details for an article:
- Category (dropdown to select an already created category; alternatively, a new category can be entered)
- Name
- Type (choose from: bulk articles, carriers, consumables or individual items; for scaffolding material, bulk articles is used by default)
- Colloquial name (space for an internal name)
- Weight
- Price
- Article numbers (selection from manufacturer catalogues or manual entry of your own article numbers; multiple assignment possible)
- Minimum stock (if the article falls below this value, it is marked accordingly in the stock overview)
- Storage location
- Carrier (selection of an already created article of the type carrier)
- Packaging unit
- Stock check (if this option is enabled, the article is shown in the mobile app for warehouse operations)
- Verification (if this option is enabled, the article must be confirmed by scanning a code before it can be edited in the mobile app)
- Comment
- Images (manually add an image, or automatic display for listed manufacturer articles)
- Own catalogues (selection from already created catalogues; multiple selection possible)
Confirm with Save.
Import from an Excel file
Section titled “Import from an Excel file”Using the Excel import, you can create or update several articles at the same time. The structure of the Excel file must match the specified import requirements.
The following columns are available for the import. The column headings must exactly match the names listed below. Fields marked in bold are required fields.
- uuid
- category
- name
- status
- type
- minimal_stock
- weight
- price
- storage_location
- alternative_name
- comment
- is_tracked
- must_verify
- item_numbers
- local_catalogs
- carrier
- package_unit
You can use the export file as a template. This can be generated via the Excel export icon in the header row of the table.
Import from manufacturer catalogues
Section titled “Import from manufacturer catalogues”Articles can be imported directly from stored manufacturer catalogues. Available article information is taken over automatically.
Editing an article
Section titled “Editing an article”To edit an existing article, click the pen icon in the Action column, or open the article by double-clicking it. This opens the detail view, where you can make changes to the article data. Confirm the changes with Save.
Deleting or deactivating an article
Section titled “Deleting or deactivating an article”Using the three-dot menu in an article’s row, the following functions are available to you:
- Deactivate (the article is then no longer available under Add article when editing lists)
- Delete (permanently removes the article from the system)
Confirm the changes with Save.
Generating a QR code for an article
Section titled “Generating a QR code for an article”So that an article can be scanned during warehouse operations, you can generate a PDF document with a QR code for printing. To do this, click the three-dot icon in the Action column and select Generate PDF.
The PDF document is then generated and saved.
Example document for article Foot spindle 60.
Batch editing
Section titled “Batch editing”To edit several articles at the same time, you have the following options:
- Check the checkbox in the table header row to mark all articles, or
- check the boxes manually for the desired articles.
Then click one of the icons at the top right of the header row.
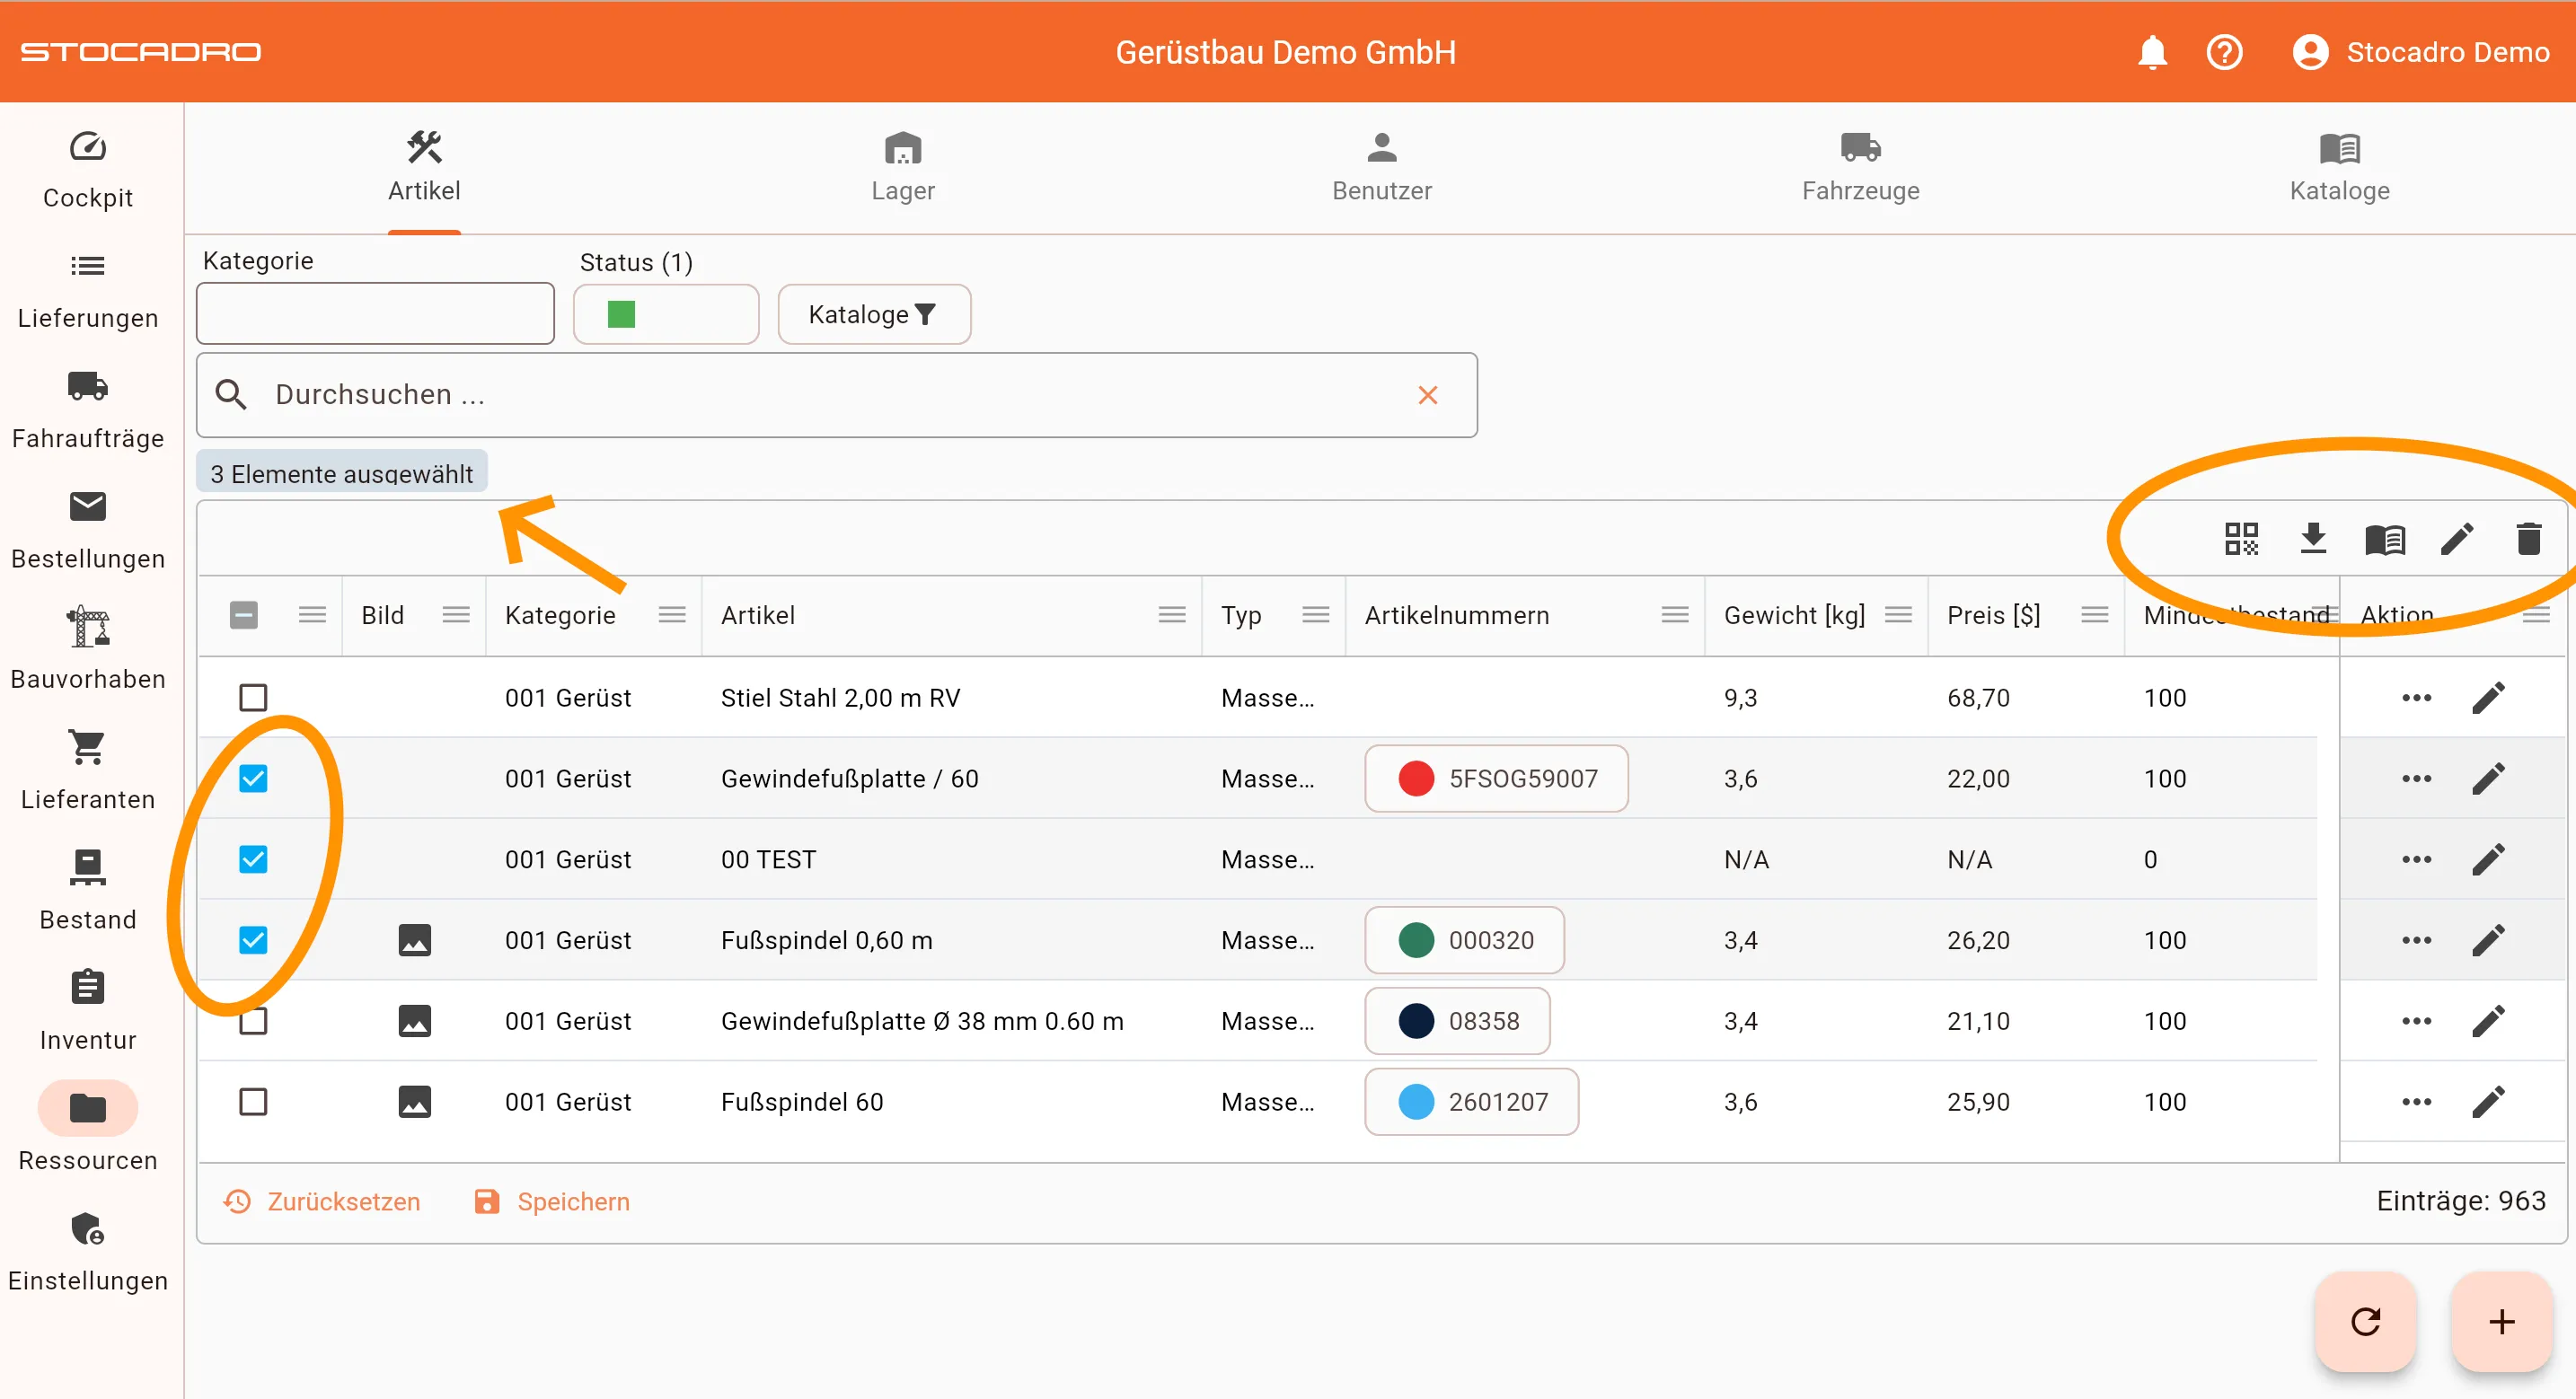
The following functions are available to you:
- Generate PDF (with QR code)
- Excel export
- Update via manufacturer catalogues
- Manually edit the selection
- Delete selected articles
Generate PDF
Section titled “Generate PDF”A PDF document with a QR code is generated for each selected article. The PDFs are generated and saved together.
Excel export
Section titled “Excel export”An Excel file with all article details is exported for the selected articles.
Update via manufacturer catalogues
Section titled “Update via manufacturer catalogues”Using this function, you can overwrite the weight and price fields of the selected articles with the values from the stored manufacturer catalogues.
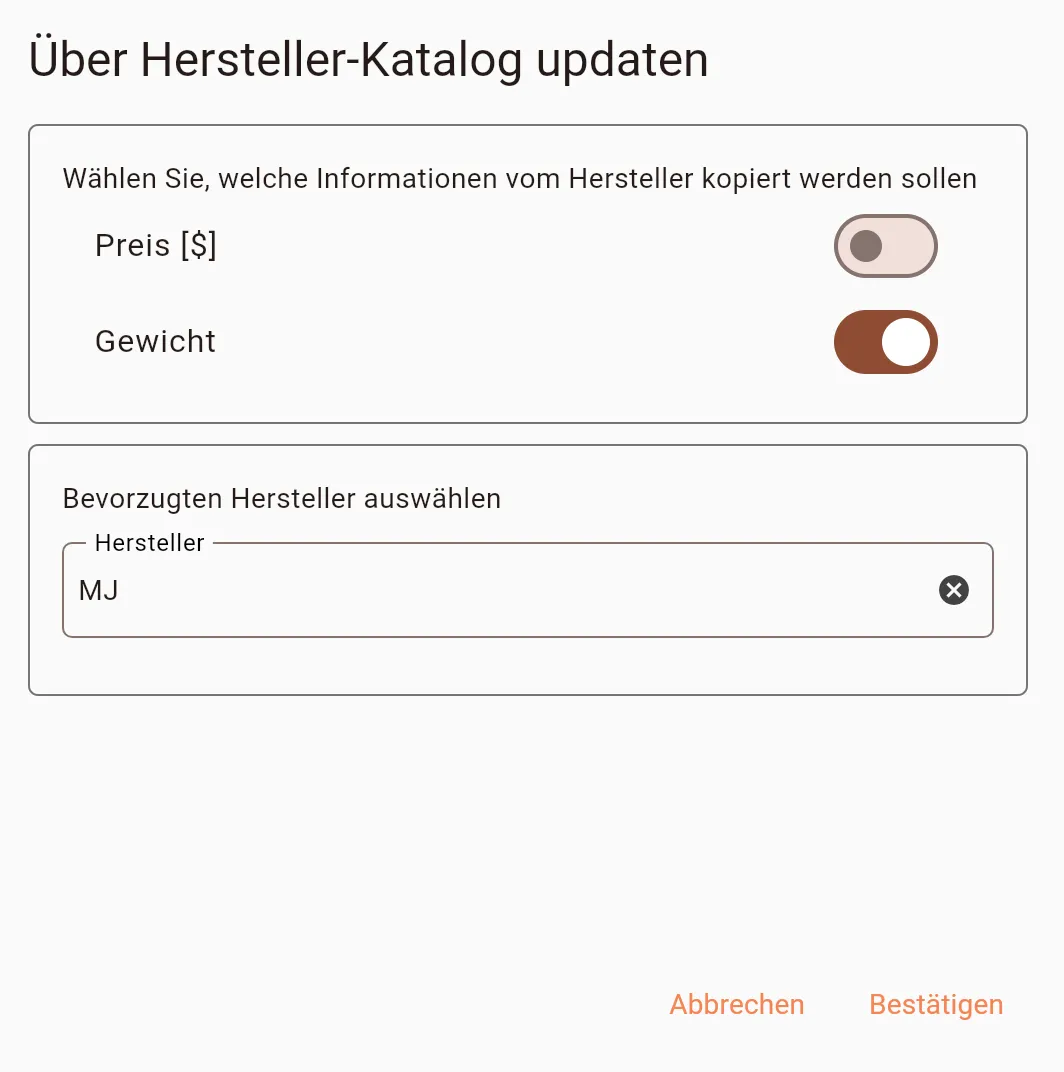
- The individual fields must be enabled via toggle switches for them to be overwritten.
- If several article numbers are stored for an article, a preferred manufacturer can be selected. In this case, the values from the selected manufacturer are used.
Save the changes with Confirm.
Manually edit the selection
Section titled “Manually edit the selection”In batch editing, you can adjust the following fields for all selected articles at the same time:
- Category
- Carrier
- Storage location
- Stock check
- Verification
- Type
Here too, the individual options must be enabled via toggle switches so that the fields can be overwritten. Confirm the changes with Save.
Delete selected articles
Section titled “Delete selected articles”This function deletes the selected articles. Confirm the deletion to complete the action.
Best practices
Section titled “Best practices”- Use the manufacturer’s designation as the article name, and add internal designations in the Colloquial name field.
- Maintain weight and unit carefully to enable correct calculations.
- Assign articles to catalogues in a targeted way to keep user views clear.
- Only delete articles once they are no longer used in active processes.