
Create
On this page you will find out how to create a new material list and what you should pay attention to.
First steps
Section titled “First steps”In the web app you will find material lists in the Material lists section. There you can create a new list using the button at the bottom right.
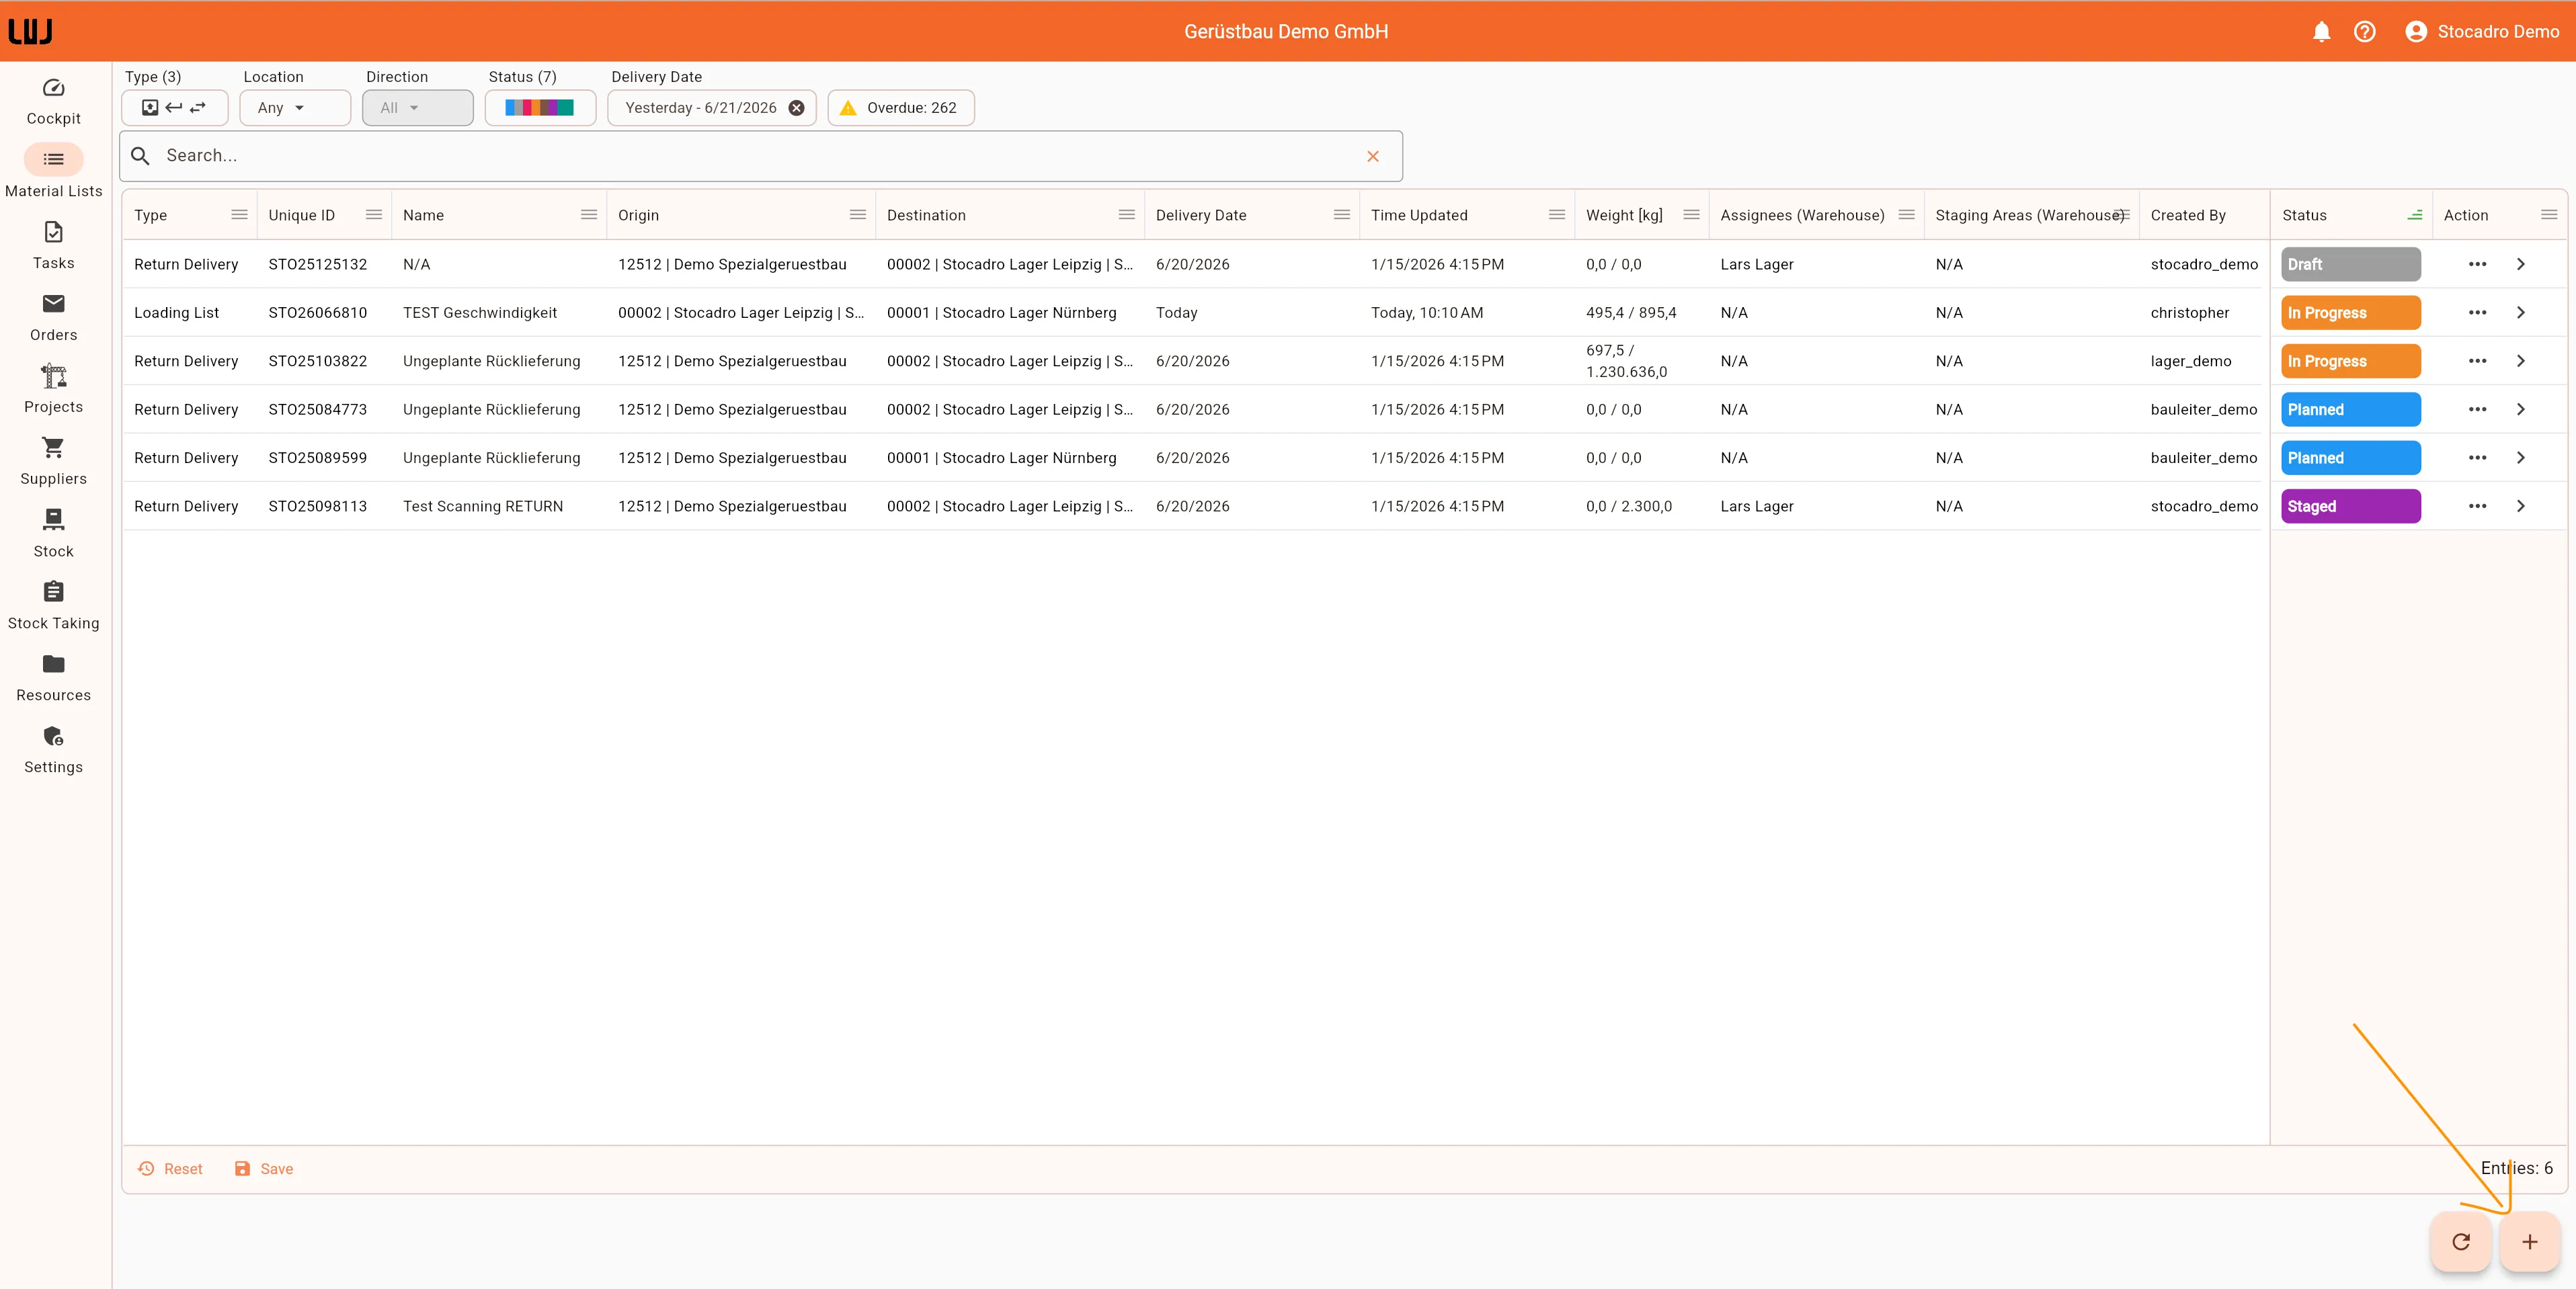
When you click the button, you can select which list type should be created. Select the appropriate type, click Next and then double-click on the desired list type. New material lists always start in the Draft status. This is convenient because it lets you prepare the list at your own pace first.
After creating a list, you go directly to the detail view of the material list.
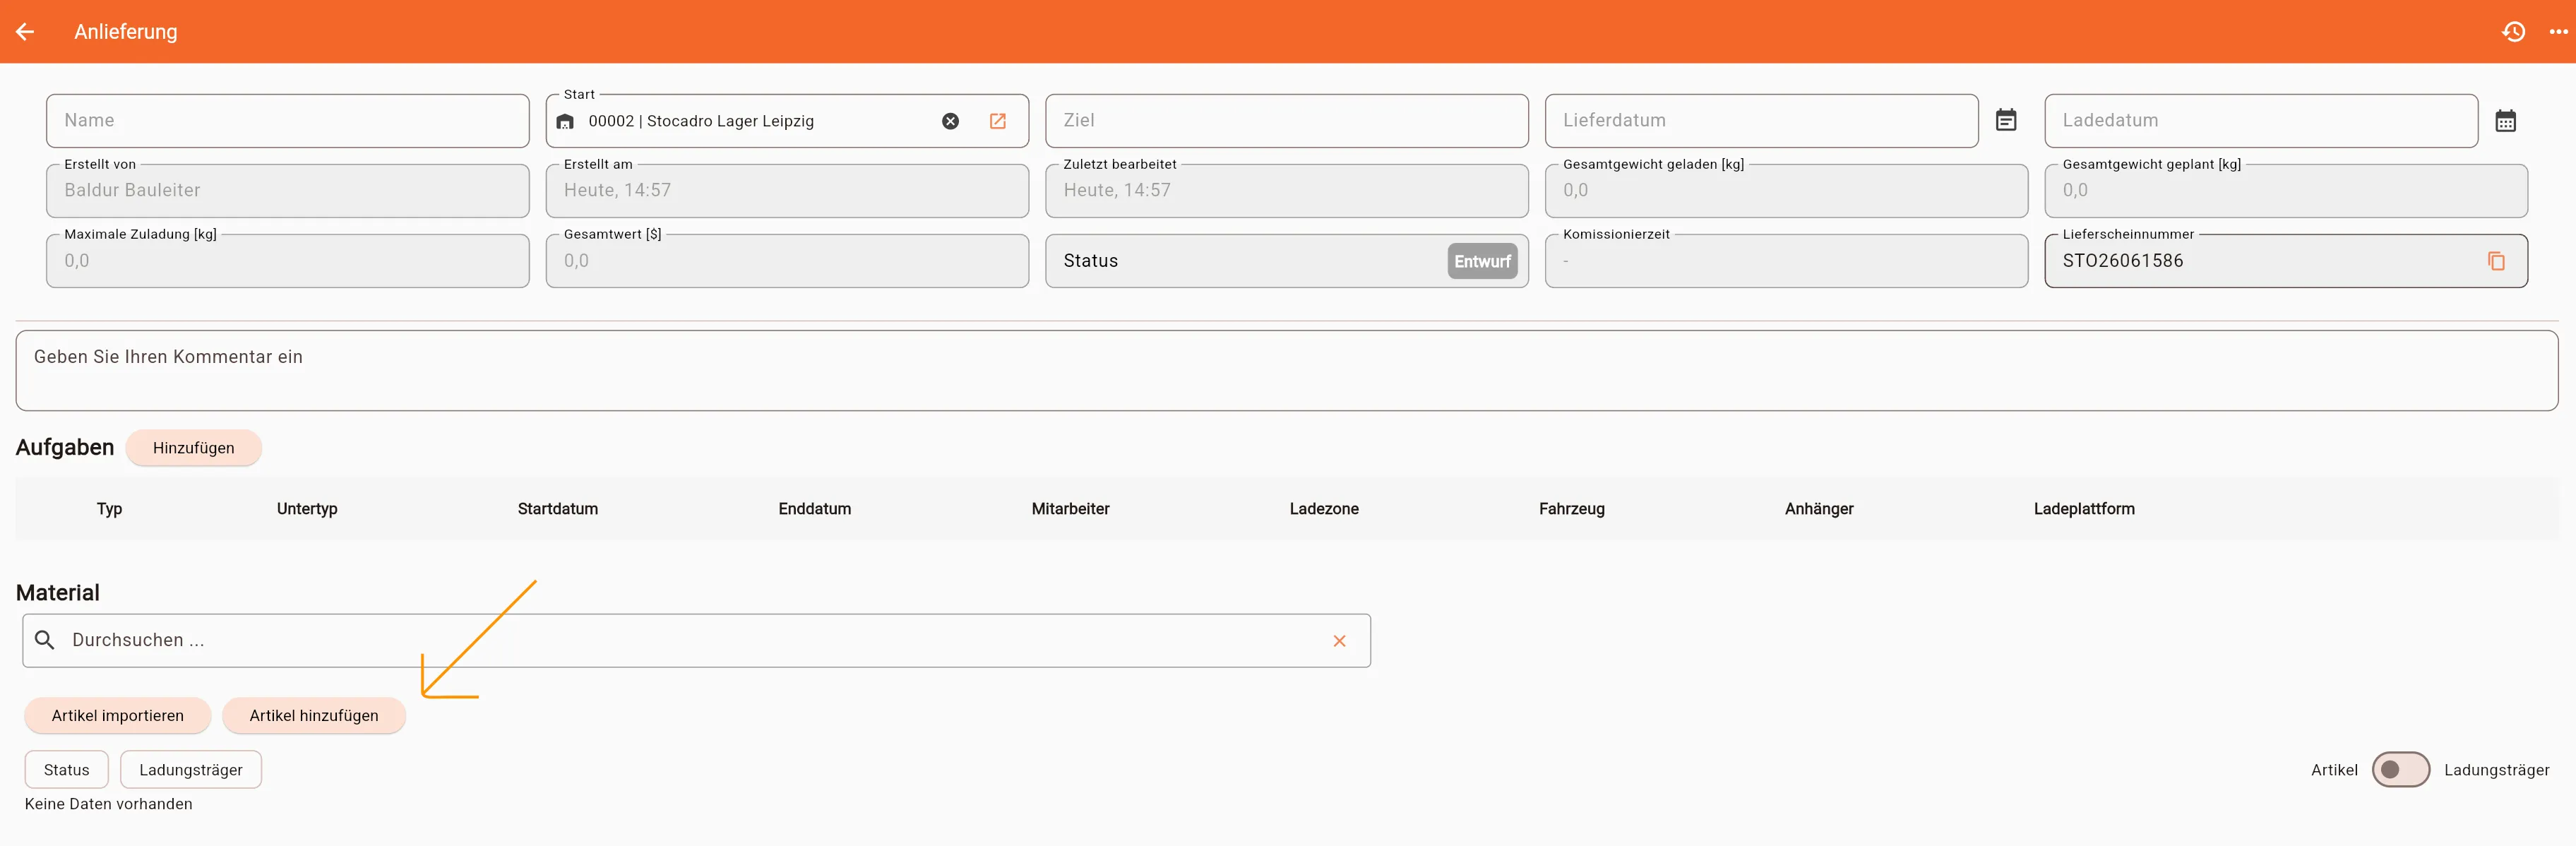
Depending on the list type, not all fields are always shown. In the detail view, you can usually fill in the following information:
- Name of the list
- Start: where the material comes from
- Destination: where the material is going
- Delivery date, or for counting lists the Count date
- Comment
Some lists also have additional fields:
- Loading date for deliveries, if this feature is enabled in the settings
- Measured weight, if this feature is enabled in the settings
Some information is shown in the detail view for reference only. This includes, for example:
- Created by
- Created on
- Last modified
- Status
- Unique ID
Once you have filled in the header data of the list, you can start adding material to the list.
Adding material
Section titled “Adding material”There are two ways to add material:
-
Via the catalogue You can select material directly from the existing article master. You can find out more about this on the Articles page.
-
By uploading a CAD file You can also import material into the list by uploading a CAD file.
Which option is the right one depends on whether a CAD plan already exists or whether you want to create the list manually.
Alternative ways
Section titled “Alternative ways”A material list can also be created directly from the project view.
To do this, go to the Projects page and open the desired project. There, switch to the Deliveries or Returns tab and create a new list from there.
The advantage of this is that the selected project is already pre-filled.
- For a delivery, the project is already entered as the destination.
- For a return, the project is already entered as the start.
This means you don’t have to select this information by hand again.
Creating lists on a mobile device
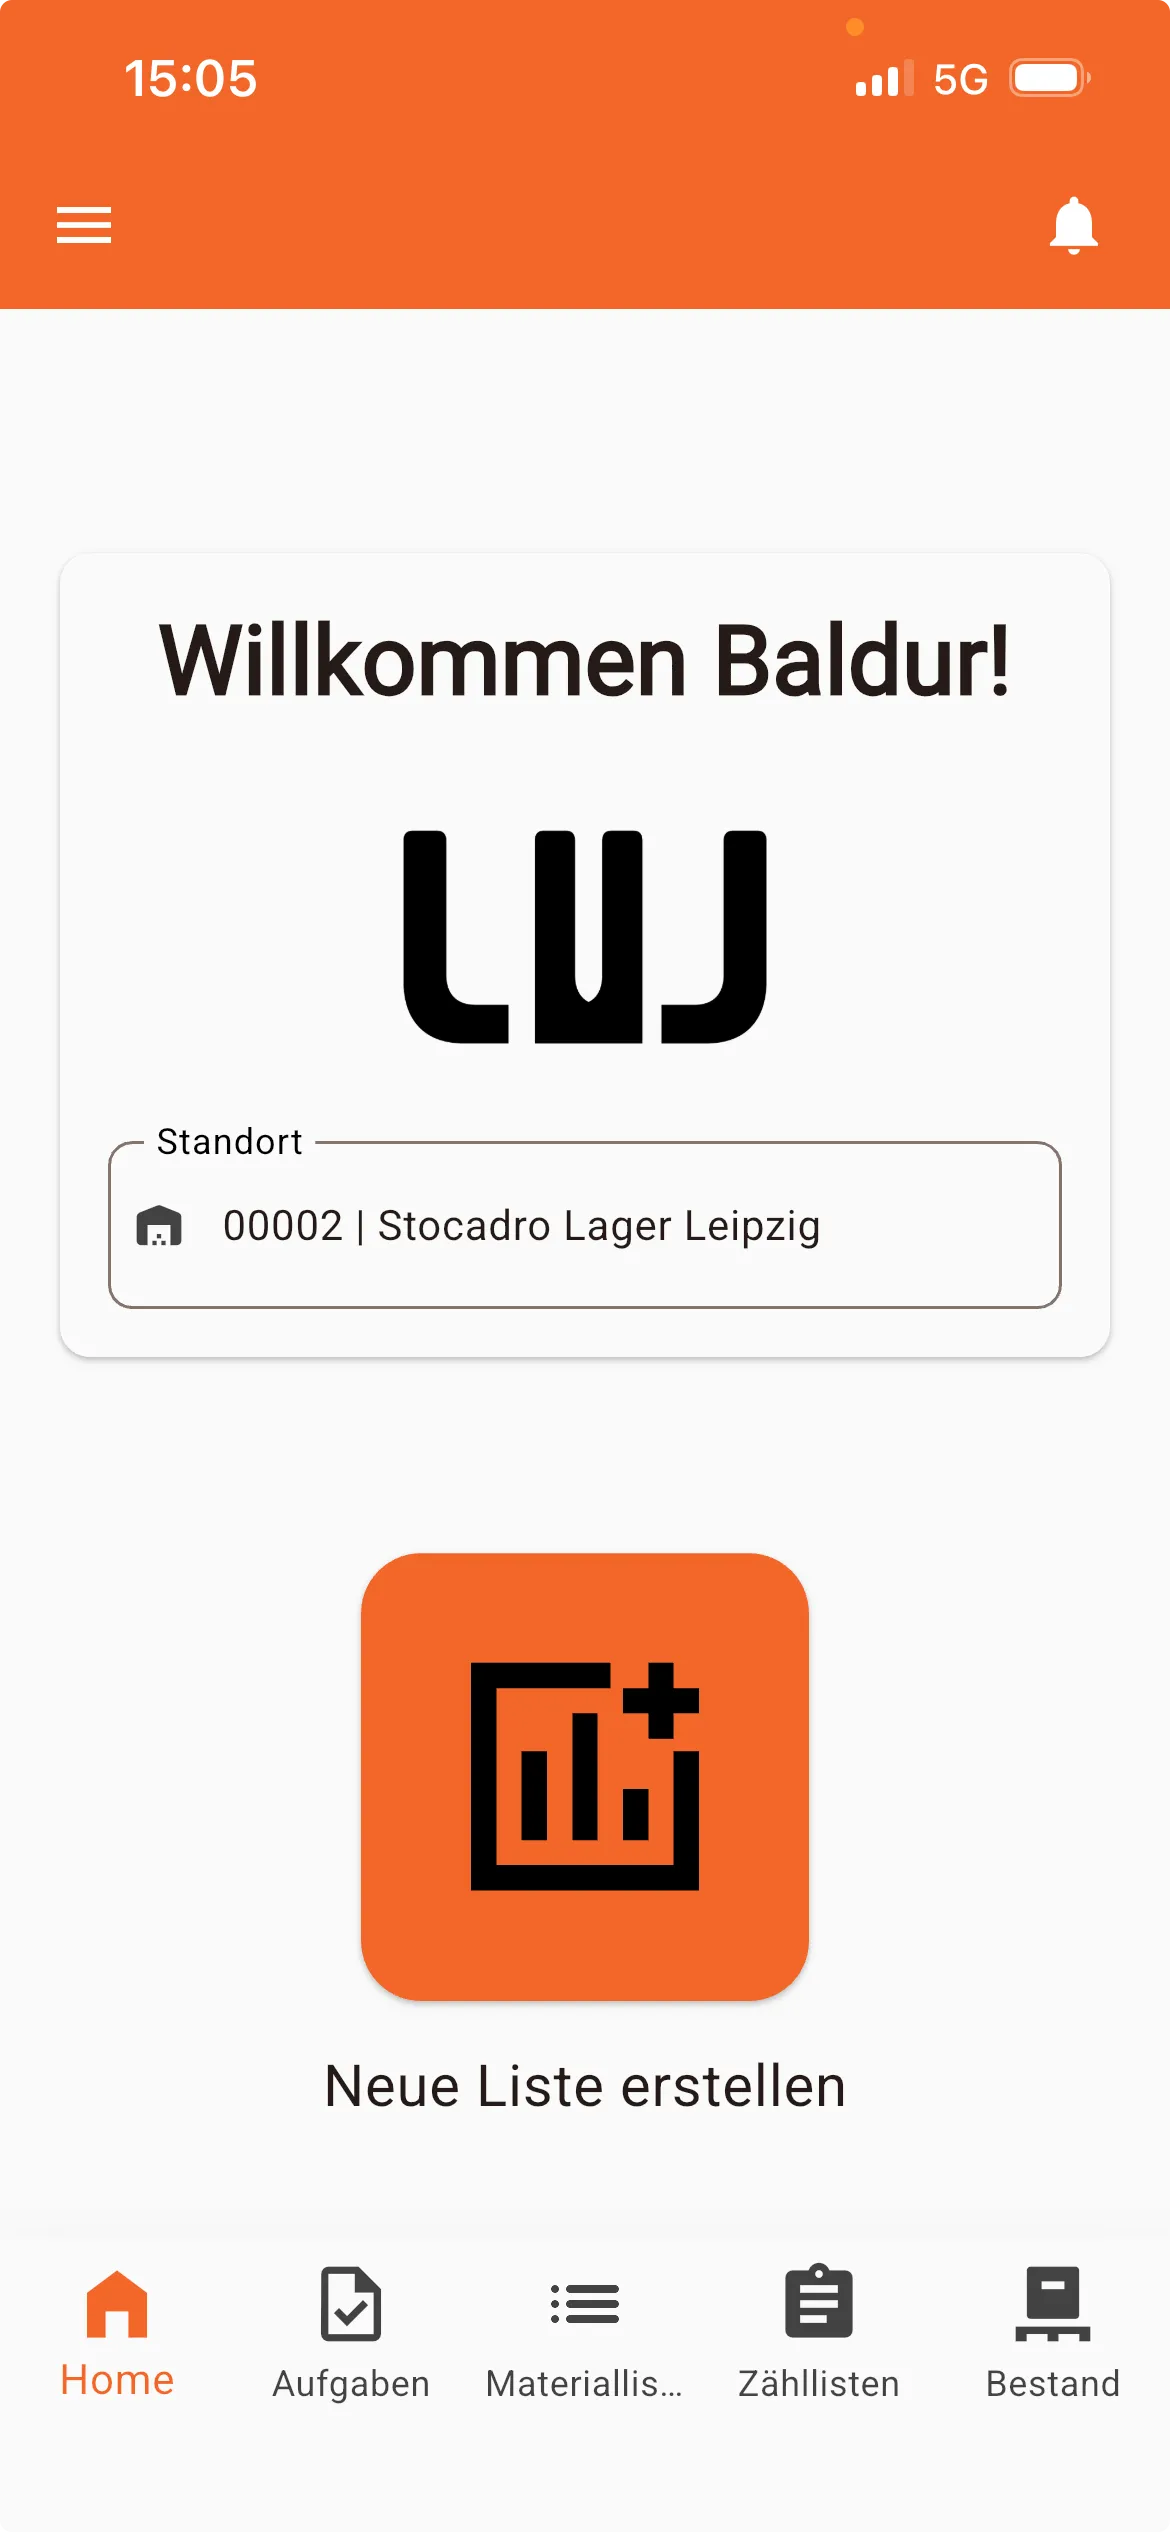
Section titled “Creating lists on a mobile device”You can create material lists on your phone in the same way, for example when you are out and about.
To do this, press the button in the bottom navigation on the home screen.
Search for parts
Section titled “Search for parts”When adding parts or creating templates, you can search by item number or name. A term starting with a digit uses exact search; names also match similar spellings. See Search for parts.
PDF documents on a material list
Section titled “PDF documents on a material list”Add plans or delivery notes using the plus button in the documents section of the detail view. Attach PDF documents explains uploading and downloading.